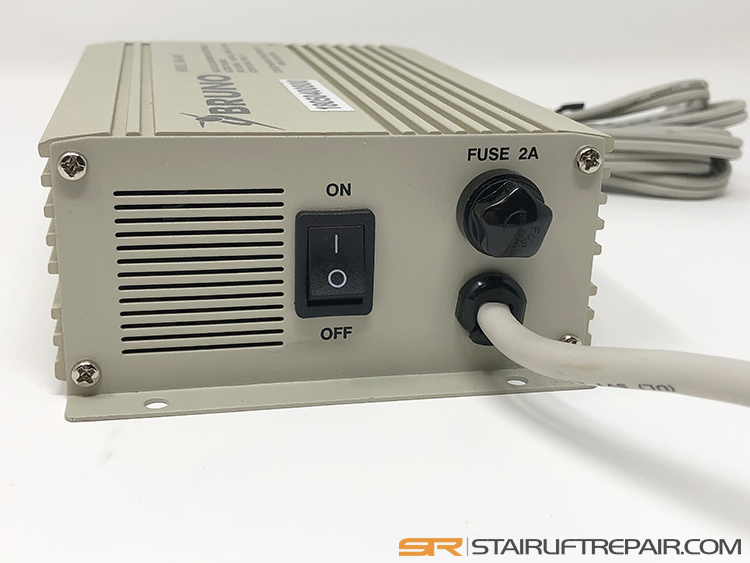
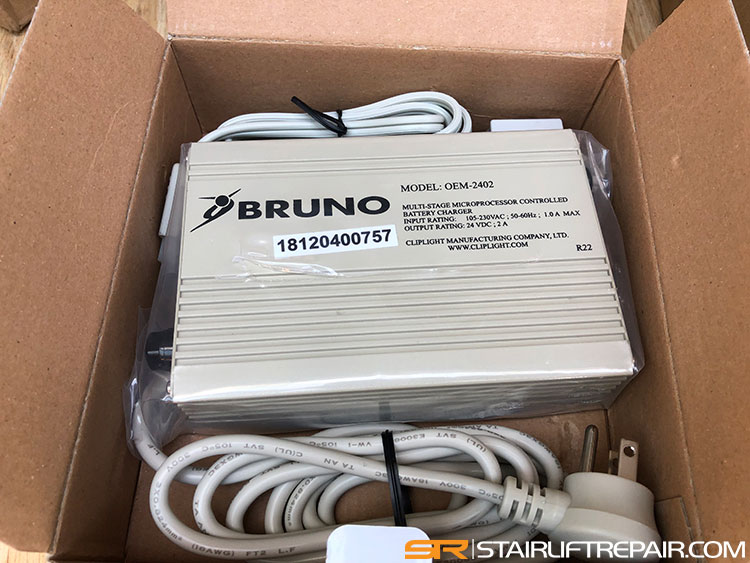
The Bruno OEM-2402 battery charger is a multi-stage microprocessor-controlled unit with an output rating of 24VDC at 2AMPS. The charger is equipt with 3 external LED indicator lights to aid in troubleshooting power supply issues. The fault and battery LEDs will only indicate a status when the lift is parked on a charging contact. The RED power LED should always be ON. If the RED light is OFF, check to confirm the wall outlet has power and the onboard fuses are still good. There is a fourth BLUE LED to detect reversed polarity.

Testing the Bruno Charger/Power Supply
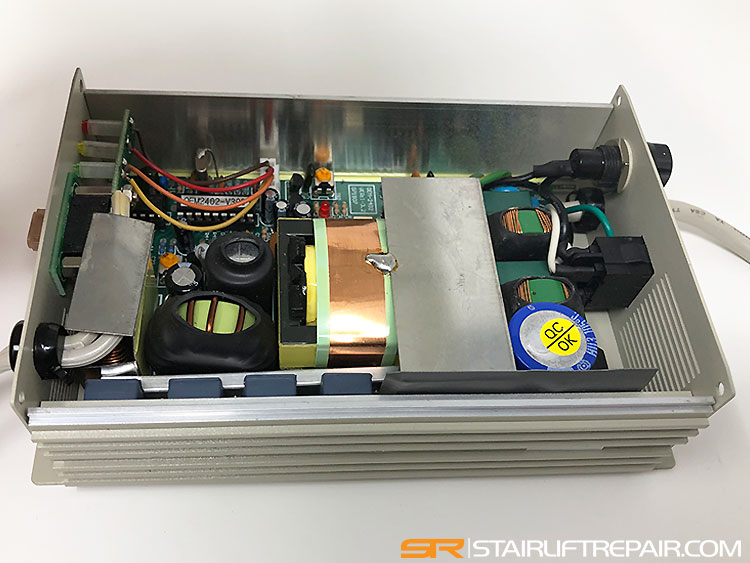
While the manufacturer doesn’t provide a schematic for this charger it’s fairly easy to detect when it’s not working. The OEM-2402 charger contains 2 fuses, one mini 5 AMP blade fuse on the front and one 2 AMP glass fuse on the back. If you’ve checked both fuses, the wall outlet, and the ON/OFF switch but still don’t see a RED light, the internal circuit board has gone bad. The complete charging unit will have to be replaced. This is the main power supply to charge the batteries that run your Bruno lift and should be repaired quickly before the internal lift batteries lose their charge or they will also need to be replaced.
The following chart is a list of the standard light codes and different possible combinations.
| RED | YELLOW | GREEN | STATUS |
|---|---|---|---|
| ON | OFF | OFF | Charger not connected to battery (AC power ON, no battery connected) |
| ON (5 sec.) | ON (5 sec.) | ON (5 sec.) | Battery disconnect situation detected (AC power ON, battery disconnect); 10-second delay until yellow and green LED’s completely off |
| ON | ON | OFF | Charger at maximum voltage/delivering maximum current |
| ON | SLOW BLINK | SLOW BLINK | Batteries close to being fully charged |
| ON | ON | ON | Batteries are fully charged |
| ON | BLINK | OFF | Low voltage indication |
| ON | OFF | FAST BLINK | Battery defective and should be checked/replaced |
Manufactures Instructions
OEM- 2402 24v 2A Switchmode battery charger
Read these instructions before you use this device
1. These instructions contain important safety and operating instructions for battery charger model OEM-2402.
2. Before using the battery charger, read all instructions and cautionary markings on the battery charger, battery, and product using the battery. This charger should be connected in reverse order from regular chargers, see operating instructions.
3. Caution – To reduce the risk of injury, charge only SLA lead-acid rechargeable batteries rated at 24v. Discuss with your battery supplier or manufacturer about recommended currents the battery should be charged with. Using other types of batteries may burst causing personal injury and damage. The charger’s output rating is described on the charger, specifics on how it charges follows under the section “specifications”.
4. Do not expose to water.
5. The use of an attachment not recommended or sold by the battery charger manufacturer may result in a risk of fire, electrical shock, or injury.
6.To reduce the risk of electrical shock, unplug the charger from the outlet before attempting any maintenance or cleaning. Turning off controls will not reduce this risk.
7. Do not operate the charger with a damaged cord or plug. Replace the cord or plug it immediately.
8. Do not operate the charger if it has received a sharp blow, been dropped, or otherwise damaged in any way. phone your equipment manufacturer/provider or a local distributor.
9. Never smoke or allow a spark or flame in the vicinity of a battery, battery charger or engine.
Shock Hazards – Warning
1. This battery charger is intended for indoor use only. do not expose the charger to rain or snow.
2. Never attempt to charge a damaged battery
3. never set the charger, output cable or clamps, or ac power cord plug in water or on wet surfaces.
4. Never use this charger on a pier or dock. The charger could fall into the water, creating an electric shock hazard.
5. Never attempt to plug in or operate the battery charger with defective or damaged wires, power cord, or power cord plug. Have the charger replaced by qualified personnel immediately. It is not A recommended practice to repair the charger.
6. Never attempt to plug in the charger or operate its controls with wet hands or while standing in water.
7. Never alter the ac power cord or power cord plug provided with the battery charger
8. Never use an attachment not recommended or sold by the battery manufacturer for use with this specific model battery charger.
9. Never operate this battery charger if it has received a sharp blow, been dropped, or similarly damaged, until after being inspected by a qualified technician.
10. Never disassemble this battery charger.
11. Always plug-in and unplug the ac power cord by grasping the power cord plug, not the power cord, to reduce the risk of damaging the power cord.
12. Always remove personal metal items such as rings, bracelets, and watches when working with a lead-acid battery. a lead-acid battery can produce a short circuit current high enough to weld a ring or any jewelry to metal, causing a severe burn.
13. Always unplug the battery charger from the ac outlet before attempting any cleaning or maintenance. turning the charger’s control(s) off, alone, will not remove all electricity from the charger.
14. Do not use this charger near equipment such as radios that are sensitive emi/rfi interference.
Explosive gas hazards warning
1. To reduce the risk of battery explosion, read, understand, and follow these instructions, those published by the battery manufacturer, and those of the manufacturer of any equipment you intend to use near the battery. Review cautionary markings on these products and on the engine. If unable to determine the battery manufacturer’s requirements for charging, always charge the battery with the cell caps in place. In addition, make certain that anyone else that uses this equipment, or is a bystander in the vicinity of a charging battery, understands and follows these safety instructions as well.
2. Never smoke or allow a spark or flame in the vicinity of the battery or engine.
3. Never operate the battery charger in a closed-in area or restrict ventilation in any way.
4. Never charge a frozen battery as a battery explosion can result.
5. Never connect both battery charger clamps directly to either of the two posts of the battery. See operation instructions for connection procedures.
6. Never charge batteries other than a lead-acid type. Do not use for charging dry-cell batteries that are commonly used with toys and home appliances. These batteries may burst and cause injury to persons or damage property.
7. Never allow the dc output clamps to touch each other.
8. Always be extra cautious to reduce the risk of dropping a metal object, such as a tool, onto or near the battery. doing so could produce a spark or short circuit the battery or other electrical parts that could lead to an explosion.
9. Always make sure the area around a battery is well ventilated while it is being charged. gas can be forcefully blown away by using a piece of cardboard or other non-metallic material as a fan.
10. Always make sure that the ac power cord is unplugged from the ac outlet or extension cord before connecting or disconnecting the battery charger connection, to prevent arcing, burning or sparking.
11. Always locate the battery charger as far away from the battery as the dc output cables will permit.
12. Always twist or rock charger clamps back and forth several times on the battery post and the other point of connection at the time of initial connection. this helps keep the clamps from slipping off their points of connection which helps reduce the risk of sparking. Do not rock the clamp connected to the battery post after the second connection is made or sparking may occur at the battery post.
13. Always check the cable and wire connections at the battery/ batteries are secure – before starting to charge. A loose connection can cause sparks or excessive heating which could cause a battery explosion.
14. Always make sure the battery compartment is open and well ventilated before charging.
Operating Instructions
This charger is designed to be very user-friendly and forgiving to users that perform the following steps out of sequence, we prefer if you used this sequence for your charging:
1. Attach the charger to the battery or battery connector with the positive terminal first when possible. make sure that a solid connection is made and it is secure.
2. Connect the charger to a 110vac/50hz or 220vac/60hz electrical outlet.
3. Turn the power switch on.
4. The first led is now on indicating power is present. the second led should come on after a couple of seconds indicating the battery charger is now charging.
5. When the third led is on, charging is complete. the second led may come on temporarily while the third is on. this indicates the battery is ready and is being maintained by the charger.
6. Turn the power switch off. disconnect the charger from the electrical outlet. disconnect the charger from the battery.
Specifications:
Battery considerations This charger is designed to recharge 24v lead acid batteries only. Consult the battery manufacturer or distributor for appropriate charging currents acceptable for their products.
LED indicators The first LED indicates power is present. the second LED should come on after a couple of seconds indicating the battery charger is now charging. The third led is on when charging is complete. The second LED may come on temporarily while the third is on, this indicates the battery is ready and is being maintained by the charger. The fourth LED (blue) indicates the battery connection is reversed.
Technical details This charger contains high power switching electromagnetics. both input and output are protected against unexpected severe overcurrent conditions. the output is also reverse polarity protected with a replaceable fuse.